Easy Long Hairstyles at Home: 8 Simple Step-by-Step Looks

Long hair gives you plenty of styling options, but many tutorials skip the details that make a style easy to recreate. A finished photo does not tell you where to place the elastic, how tightly to twist or what to do when layers slide out.
The eight easy long hairstyles below are designed for home styling. Most take five minutes or less, need only basic tools and can be adjusted for different hair textures. Start with the quick guide, choose the style that suits your hair today and follow the steps in order.
Choose a Style Based on Your Time and Hair Today
| Style | Approximate time | Best starting point | Skill level | Heat needed |
|---|---|---|---|---|
| Claw clip twist | 1 minute | Dry or second-day hair | Beginner | No |
| Wrapped low ponytail | 2 minutes | Dry, detangled hair | Beginner | No |
| Half-up rope twist | 3 minutes | Straight, wavy or curly hair | Beginner | No |
| Loose low bun | 4 minutes | Second-day hair or hair with grip | Beginner | No |
| Bubble ponytail | 5 minutes | Long, detangled hair | Beginner | No |
| Soft side braid | 5 minutes | Second-day, wavy or textured hair | Beginner | No |
| Braided low bun | 7 minutes | Hair long enough for a full braid | Beginner to intermediate | No |
| Heatless overnight waves | 5 minutes of preparation | Slightly damp, nearly dry hair | Beginner | No |
Prepare Long Hair Without Making the Process Complicated
You do not need a large product collection. A brush or wide-tooth comb, covered elastics, bobby pins and a clip will handle most of these looks. A small amount of lightweight styling cream can help shorter layers stay in place. Fine hair may benefit from a little mousse or texture spray, while coarse or curly hair may be easier to style with a small amount of leave-in conditioner.
Detangle gently before starting. Work from the ends upward instead of pulling a brush straight through knots. The American Academy of Dermatology recommends gentle detangling and low or medium heat when hot tools are used. Its guide to hair styling without damage also advises limiting repeated tight styles and excessive heat.
A style should feel secure, not painful. If your scalp feels sore or your hairline is being pulled, loosen the elastic, move the pins or choose a lower-tension option.
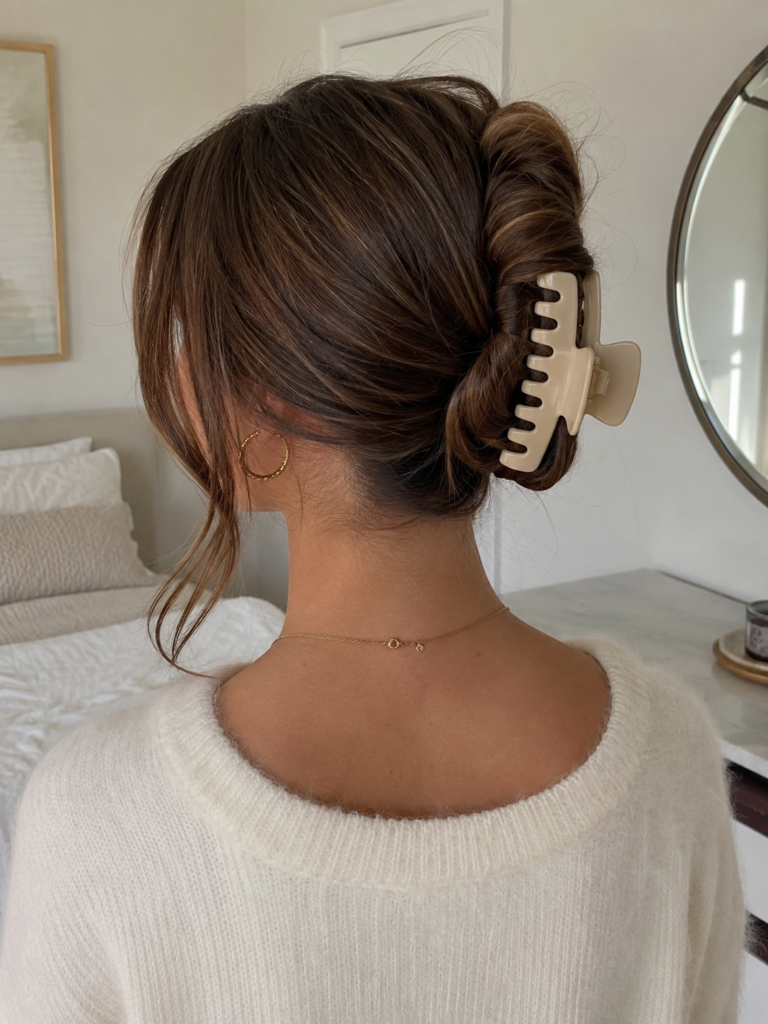
1. The One-Minute Claw Clip Twist
A claw clip twist is useful when you need your hair off your face without making a ponytail or bun. The size of the clip matters more than the technique. Choose one that can hold your hair without springing open.
What you need
- One medium or large claw clip
- A brush or comb, if needed
How to do it
- Gather your hair at the nape as though you are making a low ponytail.
- Twist the length upward against the back of your head.
- Fold the loose ends downward if your hair extends above the crown.
- Hold the twist with one hand and place the clip vertically over its center.
- Release your hand slowly and check that the clip grips both the twist and the hair close to your scalp.
Make it work for your hair
For thick hair, use a longer clip with widely spaced teeth or divide the hair into two stacked twists. For fine hair, twist a little more firmly before clipping so the style has enough structure. If you have short face-framing layers, leave them out intentionally rather than forcing them into the clip.
Fix a slipping clip
The clip may be too small or placed only around the twisted length. Reopen it and catch a little hair from both sides of the head. If freshly washed hair feels too slippery, use a small amount of light styling cream through the mid-lengths.
2. The Wrapped Low Ponytail
A wrapped low ponytail looks more finished than a standard ponytail but requires only one extra step. It works well when you want a simple style that sits comfortably below a hat, head covering or coat collar.
What you need
- One covered elastic
- One bobby pin
- Optional smoothing cream
How to do it
- Choose a center part, side part or no visible part.
- Gather your hair at the nape without pulling tightly at the temples.
- Secure the ponytail with a covered elastic.
- Take a narrow strand from underneath the ponytail.
- Wrap that strand around the elastic until the band is hidden.
- Slide a bobby pin through the wrapped strand from underneath.
Make it look intentional
Smooth only the areas that need it. A few natural bends and flyaways can keep the ponytail soft. For more volume, hold the base of the ponytail and gently lift a small amount of hair at the crown with your fingertips.
Fix a visible pin
Insert the pin beneath the ponytail rather than from the side. The wavy side of a standard bobby pin should face the scalp for better grip.
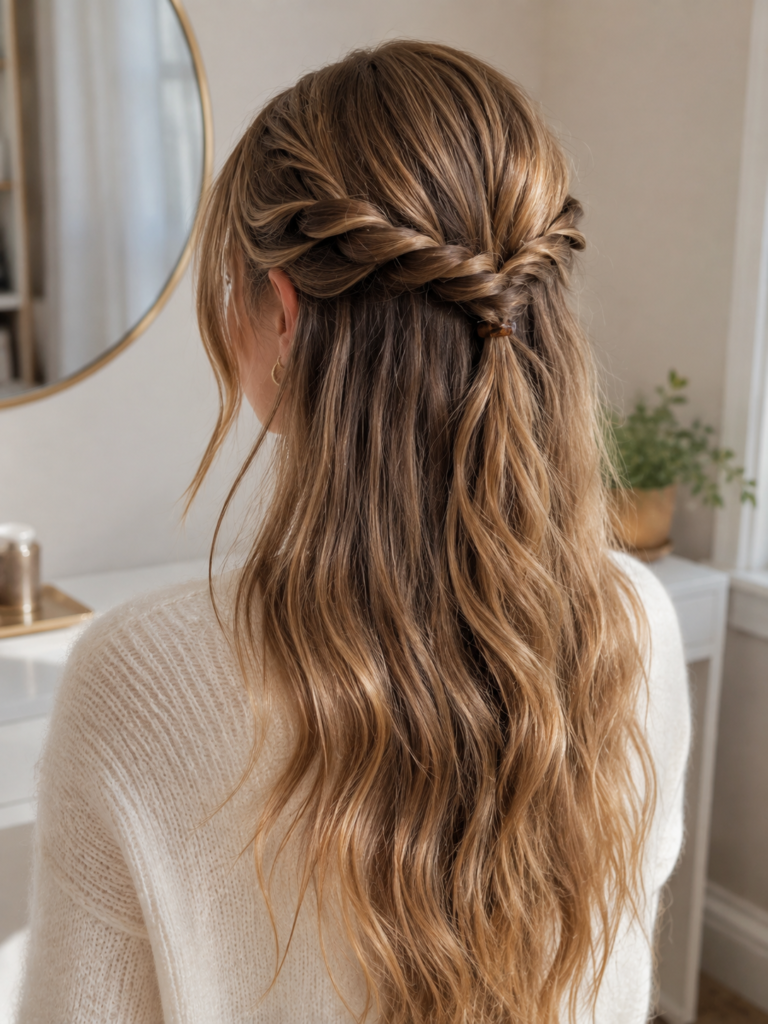
3. The Half-Up Rope Twist
This half-up style keeps the front sections away from your face while leaving most of your length visible. It is easier than a braid because each side uses only two pieces of hair.
What you need
- One small elastic, decorative clip or barrette
- Two bobby pins for shorter layers, if needed
How to do it
- Take a section of hair from above your right ear and divide it into two pieces.
- Twist both pieces in the same direction.
- Wrap the two twisted pieces around each other in the opposite direction.
- Repeat on the left side.
- Bring both rope twists to the back of your head.
- Join them with a small elastic or clip just below the crown.
- Gently loosen the twists with your fingertips if you want a softer finish.
Adjust it for volume
Fine hair can look fuller when the joined twists sit slightly below the crown rather than flat against the head. Thick hair may need larger side sections and a stronger clip. Curly hair can be twisted in its natural pattern without brushing out the texture.
If your haircut has many shorter pieces, the guide to choosing layered hairstyles for your face shape can help you decide which face-framing strands to leave loose.
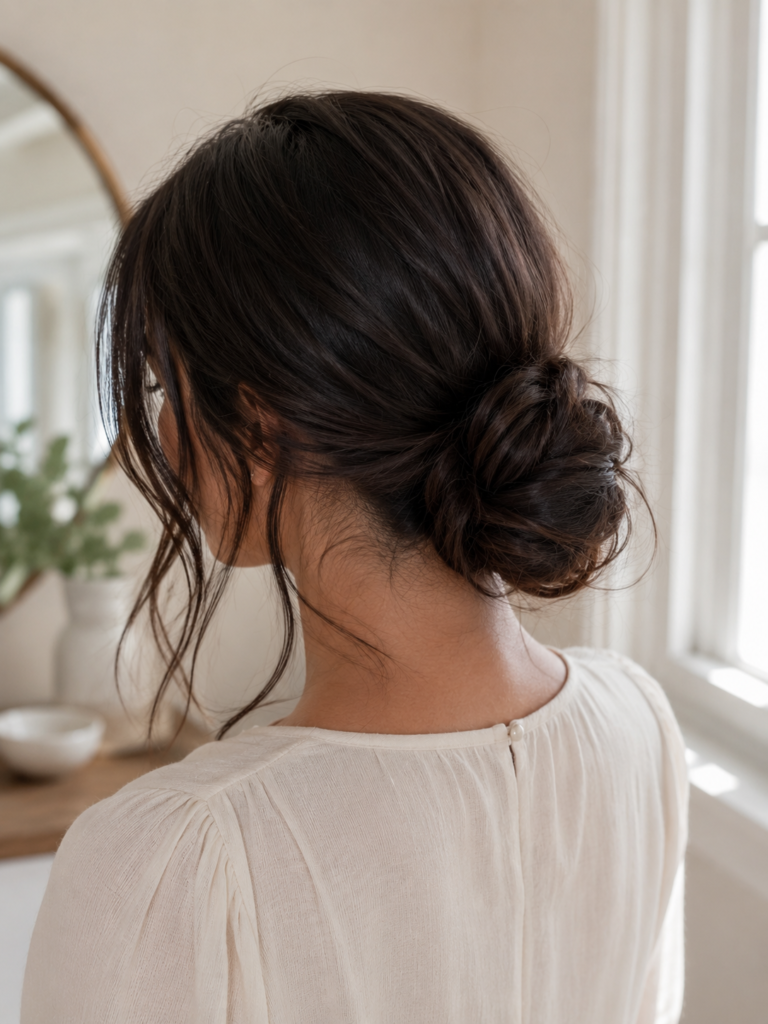
4. The Loose Low Bun
A loose low bun is one of the easiest ways to manage long hair on a busy day. The key is building the bun around a secure base instead of trying to hold the entire twist with several random pins.
What you need
- One covered elastic
- Two to four bobby pins
How to do it
- Make a low ponytail at the nape.
- Loosen the elastic slightly so the base does not feel tight.
- Twist the ponytail until it begins to coil.
- Wrap the twist around the elastic in a flat circle.
- Tuck the ends beneath the bun.
- Insert pins toward the center of the bun so they catch both the coil and the hair at the scalp.
- Loosen one or two small sections near the face if you prefer a softer outline.
Adapt it for very long or thick hair
Do not force all the hair into one tight coil. Divide the ponytail into two sections, twist each section separately and wrap them around the base in opposite directions. This spreads the weight and makes the bun flatter.
Fix a bun that drops
The elastic base may be too loose or the pins may be sitting only inside the coil. Rebuild the ponytail and insert each pin through the outer edge of the bun before turning it inward toward the scalp.
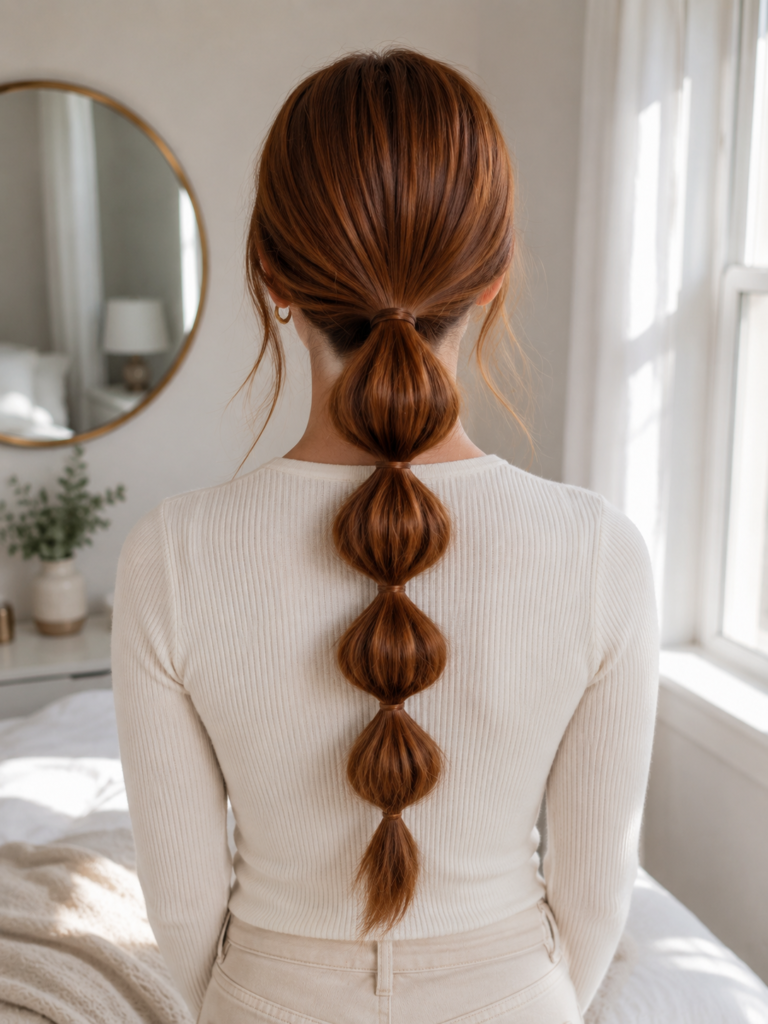
5. The Bubble Ponytail
A bubble ponytail controls the length of the hair without requiring braiding skills. It works especially well on very long hair because the repeated elastics keep the ponytail from moving as one heavy section.
What you need
- One covered elastic for the base
- Three to six small snag-free elastics
- Optional styling cream
How to do it
- Make a ponytail at a comfortable height.
- Place a small elastic about a hand-width below the base.
- Hold the elastic with one hand and gently pull the hair between the two bands outward.
- Add another elastic the same distance below the first.
- Repeat until you reach the lower part of the ponytail.
- Compare the sections and adjust them so the bubbles look balanced.
Adjust it for fine or layered hair
Use shorter spaces between elastics on fine hair. Smaller bubbles tend to keep their shape better. For layered hair, smooth a tiny amount of styling cream over the ponytail before adding the bands. Do not apply so much that the sections become flat or sticky.
Fix uneven bubbles
Do not pull only from the outermost surface. Use your fingertips to loosen hair from the front, sides and back of each section. Work gradually because a bubble is harder to shrink after it has been pulled too wide.
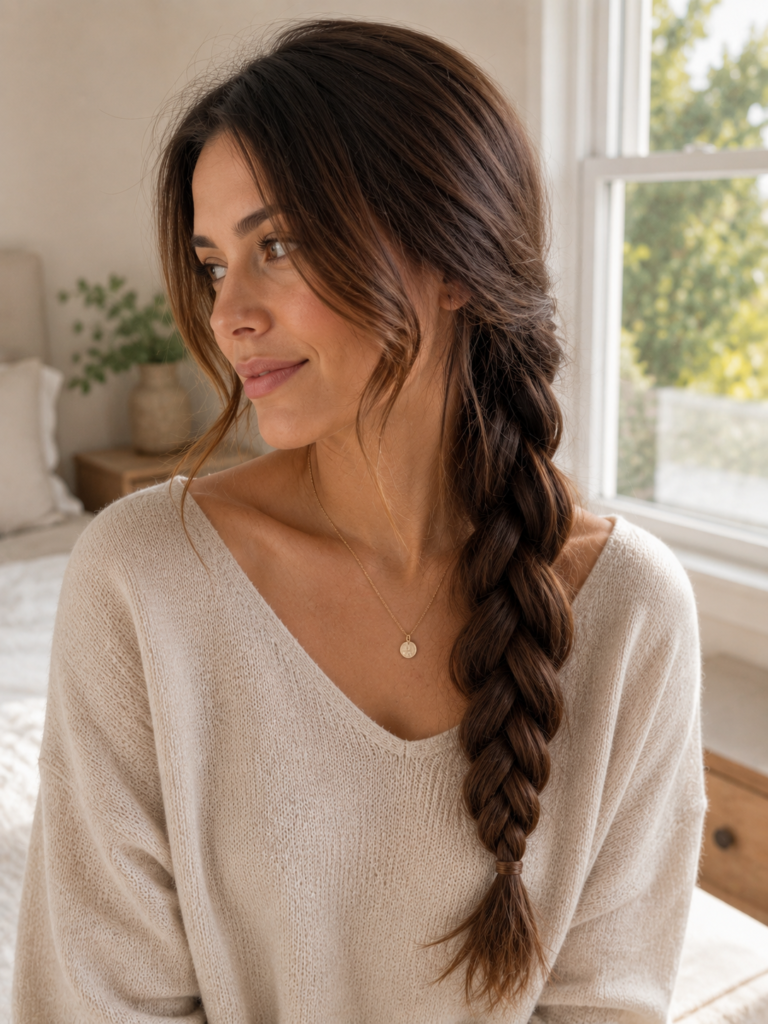
6. The Soft Side Braid
A three-strand side braid is a reliable choice for long hair that tangles easily around bags, scarves or coat collars. It is also a good practice style before learning French, Dutch or fishtail braids.
What you need
- One small covered elastic
- Optional texture spray or light styling cream
How to do it
- Bring all your hair over one shoulder.
- Divide it into three even sections.
- Cross the outside right section over the middle.
- Cross the outside left section over the new middle.
- Continue alternating sides while keeping the braid close to your shoulder.
- Secure the end with an elastic.
- Starting near the bottom, gently pull the outer edges of the braid to make it look softer and fuller.
Adapt it for different textures
Straight fine hair may need a little grip before braiding. Wavy and curly hair can be braided without smoothing away the natural texture. For heavily layered hair, begin the braid lower and allow shorter pieces to frame the face.
For more braid variations with their own instructions, see Femorias’ guide to easy braid hairstyles for busy mornings.
Fix a braid that unravels
The starting sections may be uneven or the braid may be too loose at the first few passes. Undo only the top portion and rebuild it with equal sections. Keep steady tension without pulling at the scalp.
7. The Braided Low Bun
A braided low bun uses the structure of a braid to stop long hair from sliding out of a coil. It looks polished enough for an office day, dinner or an event but uses the same basic three-strand technique as the side braid.
What you need
- Two covered elastics
- Three to five bobby pins
How to do it
- Make a low ponytail and secure it with the first elastic.
- Braid the ponytail in three sections.
- Secure the end with the second elastic.
- Wrap the braid around the ponytail base.
- Tuck the end beneath the bun.
- Pin the bun at several points, directing each pin toward the center.
- Press the finished bun gently to check that no section moves independently.
Make it softer or sleeker
For a softer bun, loosen the braid slightly before wrapping it. For a cleaner finish, keep the braid compact and smooth the hair at the nape with a small amount of styling cream.
Fix a bulky center
Very long hair can create too many layers around the base. Flatten the braid as you wrap it and widen each circle instead of stacking every turn in the same place.
8. Heatless Overnight Waves
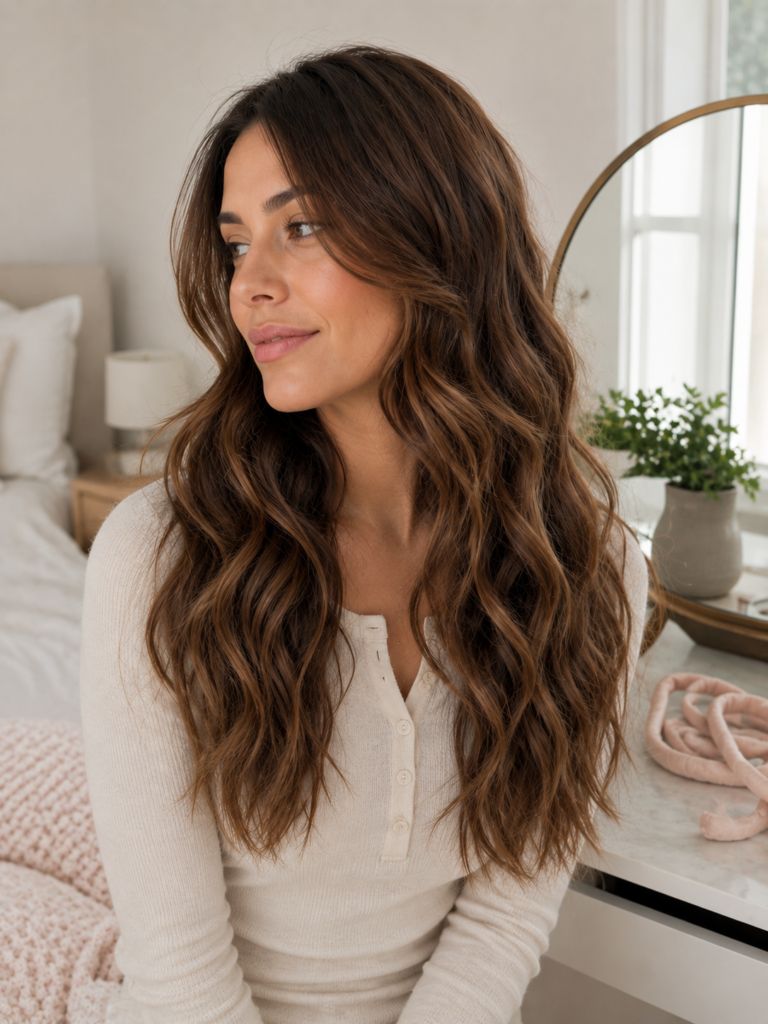
Heatless waves require a few minutes of preparation the night before, then very little work in the morning. The result depends on your natural texture, the amount of moisture in the hair and the size of the sections. Treat the method as a flexible styling technique rather than a promise of identical curls.
What you need
- Two soft fabric ties or scrunchies
- A robe belt, long foam curler or two soft socks
- Optional leave-in conditioner for dry ends
How to do it
- Begin with hair that is slightly damp but nearly dry.
- Part the hair where you want it to sit the next day.
- Place the robe belt or soft curler over the top of your head with equal lengths on both sides.
- Take a front section and wrap it away from your face around the fabric.
- Add a little more hair to the same section with each wrap.
- Continue to the ends and secure them with a soft tie.
- Repeat on the other side.
- In the morning, remove the ties without pulling.
- Separate the waves with your fingers rather than brushing them immediately.
Adjust the wave pattern
Use larger sections for loose bends and smaller sections for more definition. Fine hair may set quickly, while thick or low-porosity hair may need more drying time. If your roots remain damp in the morning, release the wraps and let the hair finish drying before separating the waves.
A lightweight leave-in product can help with detangling and frizz, especially on long, dry or heat-styled hair. The American Academy of Dermatology explains who may benefit in its leave-in conditioner guidance.
How to Help an Easy Hairstyle Stay in Place
A secure style does not have to be tight. Better placement and the right tools usually matter more than pulling harder.
- Use an elastic that is strong enough for the amount of hair but does not catch individual strands.
- Cross two bobby pins when one pin keeps sliding.
- Insert pins toward the center of a bun rather than straight across its surface.
- Add product only where it solves a problem, such as slippery roots or loose layers.
- Keep the first version simple. Accessories can be added after the structure feels stable.
- Practice a new braid or twist when you are not rushing. Familiar hand movements make the style faster later.
Hair-Friendly Styling Habits
Repeated pulling in the same place can stress the hairline and scalp. The American Academy of Dermatology notes that tight buns, ponytails and braids can contribute to traction alopecia when they are worn too tightly or too often. Its guidance on hairstyles that pull recommends loosening styles, changing hairstyles regularly and responding to pain or scalp discomfort.
Rotate between high, middle and low placements instead of securing your hair at the same point every day. Choose loose styles after a day of firm hold. When using heat for a variation of these looks, work on dry hair, use low or medium heat and limit repeated passes over the same section.
A hairstyle that causes pain, stinging or visible pulling is too tight. Remove or loosen it rather than expecting the discomfort to fade.
Build a Small Rotation Instead of Learning Everything at Once
Start with three styles that solve different problems. A claw clip twist handles the fastest mornings. A soft side braid controls tangles. A loose low bun gives you a more polished option. Once those feel automatic, add the bubble ponytail, half-up rope twist or braided bun.
The easiest long hairstyles at home are not necessarily the styles with the fewest steps. They are the ones that suit your hair texture, work with the time available and stay comfortable while you wear them.
Frequently Asked Questions
What is the easiest hairstyle for long hair?
A claw clip twist is usually the fastest because it needs one tool and no sectioning. A wrapped low ponytail is another beginner-friendly option when a clip does not hold the thickness of your hair.
Which styles work well on second-day long hair?
The loose low bun, side braid, braided low bun and claw clip twist all benefit from a little natural grip. If the roots feel oily, adjust the part or leave a few front pieces loose instead of applying heavy product across the entire head.
How can I stop layers from falling out of an updo?
Use a small amount of lightweight styling cream on the shorter pieces, place crossed bobby pins where they slip or leave the shortest strands out as intentional face-framing sections. Forcing every layer into a tight style can create unnecessary tension.
Can long hair be styled without heat?
Yes. Every style in this guide can be created without heat. Heatless waves need slightly damp hair and time to set, while the remaining styles use elastics, clips, pins or simple twisting and braiding.
Why does my ponytail or bun hurt?
The style may be too tight, too high or too heavy for the elastic being used. Lower the placement, loosen the base, use a covered elastic and alternate where you secure your hair. Remove the style if the scalp remains painful.
Which styles work for second day hair?
The headband tuck and messy bun are perfect for unwashed hair. They hide greasy roots beautifully. So they let you skip a wash while still looking lovely.